A quality stain protects your fence from the elements, saving you money through lower maintenance costs. It also highlights your beautiful materials, enhancing their appearance.
Proper preparation ensures a smooth, even finish that lasts longer. Addressing repairs and cleaning thoroughly are important first steps. The right tools make the job easier and more efficient.
Preparation
The process of staining your fence requires some level of preparation to ensure that the stain will stick, adhere properly and look its best. This includes a thorough inspection to determine the level of organic growth, dirt or mildew that needs to be cleaned and the type of stain you will use.
There are several different types of wood stain to choose from and a professional can help you decide the best option for your particular fence. You can opt for a transparent stain, which allows the natural grain of the wood to shine through and provides subtle color accents. You can also choose a semi-transparent stain, which will provide more coverage and allow you to choose between several color options.
When choosing a color, consider the dominant colors of your home, landscaping, and any other outdoor features. A solid stain is another great option for new or older fences that need a little extra attention to detail to hide imperfections and ensure an even look.
To prepare the area for staining, trim any plants or shrubs that are close to the fence and cover anything else that you don’t want stained such as garden tools or furniture. It’s a good idea to lay down a drop cloth as well, just in case there are any drips that may run off during the process.
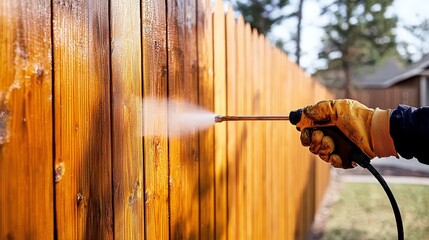
Tools
Staining a fence is not a do-it-yourself project for the faint of heart. But with the right materials and steps, you can achieve professional results that protect your Ann Arbor property from weather damage and add curb appeal. We offer a wide selection of staining supplies and techniques at Reno Paint Mart, including oil-based stains that soak into wood more evenly and resist peeling.
The type of stain you use depends on your preference and the look you want to achieve. We typically recommend semi-transparent stains, which balance color and visible wood grain and last up to 5 years before needing recoating.
Before applying the stain, make sure to read the product’s label and follow all directions. You can apply the stain with a brush, roller, or sprayer. If you use a sprayer, be sure to keep a brush on hand to reach difficult areas and cover any overspray.
Before you begin, remove any obstacles that will interfere with your work and prepare the area. Lay down drop cloths to protect nearby plants, concrete surfaces, and outdoor furniture from stain drips or overspray. If necessary, sand the wood surface to improve stain absorption and create a smooth finish. If you choose to sand, use medium-grit sandpaper and a tack cloth to remove all dust from the surface of the wood.
Weather
The weather conditions that occur during the staining process impact how your project turns out. For example, wind can blow dirt onto your freshly painted surface, and it can accelerate the drying process, which leads to an uneven finish. For these reasons, it’s important to choose a calm day for staining, or work in an area sheltered from the wind.
Moisture is another major factor that influences the quality of your fence staining. Aim for staining when the wood is dry and below 15% moisture to ensure that the stain penetrates deep into the grain and texture of the wood, providing a more uniform look and additional protection from damaging weather elements.
Spring and fall are ideal times for staining because they offer mild temperatures and minimal rainfall in most regions. Staining in these seasons also helps the stain set up before the onset of winter when harsh temperatures and moisture can damage the fence’s structure.
When staining a new or old wood fence, it’s best to opt for a stain with a sealant because it adds an extra layer of protection against moisture and sun damage. Stains with sealants can last 3 to 5 years longer than stains without a sealant. It’s also important to follow the instructions printed on your stain product for proper drying time.
Staining
Staining can be an involved project, but if you take the time to prepare the area and use quality stain it is possible for the average homeowner to get professional results. Staining a fence will help to keep it protected from the sun and other harsh weather elements and look good for many years to come.
Before starting the staining process, be sure to clear any items from the work area that you don’t want to be stained (like lawn ornaments and rose bushes) and cover nearby surfaces like sidewalks and paving stones with a tarp to avoid getting them wet. Also, using painter’s tape and drop cloths can protect items you don’t want to get dirty during the staining process such as flower beds and grass.
The next step is to examine the wood for any areas that need to be repaired, such as splintering or warping. If necessary, these boards can be fixed with a wood filler or replaced with new ones.
If the wood is cedar, pine or another type that has a natural brightness, you may decide to choose a transparent stain that will highlight the wood grain and color rather than add much additional color. If the wood needs more protection from the sun and other weather elements, a semi-transparent or solid stain is likely a better choice.